

Duration
± 1 hour
Tools
- Jigsaw with wood jigsaw blade
- Orbital Sander with 100 grit sanding paper disc
- Circular saw or a home Improvement can cut the wood for you for an extra fee.
- Power Drill
Materials
- (include SKU)
- 1 x Multipurpose pine panel 19mm x 305mm x 1200mm
- Tape measure and pencil
- Clear sealer
- 40mm to 50 mm hole saw bit
- Wood glue
- Wood filler and scraper
- Medium Wood screws (4.0 x 35mm in length) and driver bit
- Counter sink 3mm drill bit
- Medium spreader clamps
- Speed square
-
Step 1 Cut
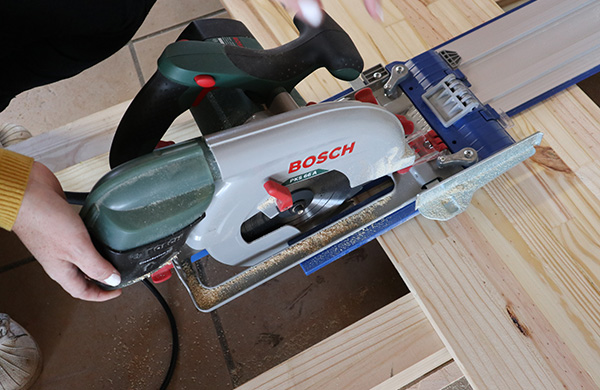
Use a circular saw or the cutting services at a hardware store and cut the multipurpose panel into the sizes —— 1 x 19mm x 305mm x 600mm —– 2 x 19mm x 305mm x 250mm
-
Step 2 Sand

Sand down the wood pieces until edges and surfaces are smooth and wipe off excess sawdust.
-
Step 3 Measure, Mark and placement
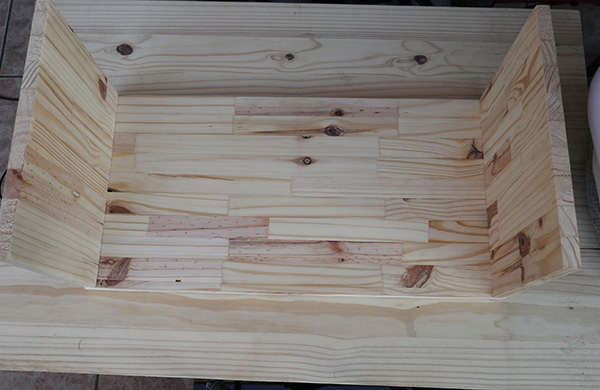
Mark placement and pencil guide lines of the sides of the Laptop tray using the 2 x 19mm x 305mm x 250mm pine wood pieces on to the bigger wood board. These guide lines will help you drill pilot holes in place for securing screws.
-
Step 4 Drill Pilot holes

Insert the 3mm counter sink drill bit into the power drill and drill 3 evenly spaced pilot holes in the guide lines marked on either side of the 19mm x 305mm x 600mm wood board. This counter sink bit will help to sink the screw heads flush with the wood surface later on. DIY tip- use a scrap piece of wood to place under the drilling section to protect your work surface and limit wood splitting when Drilling.
-
Step 5 Cut out the round edges of side handles of tray
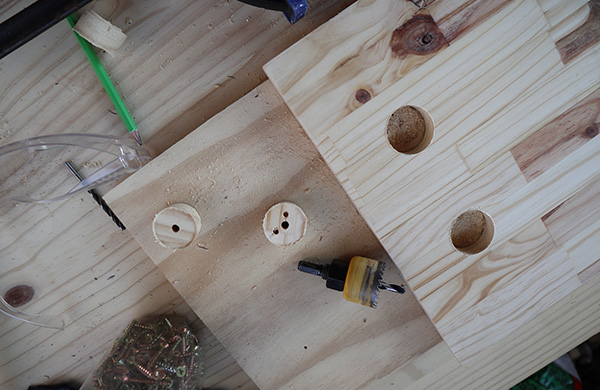
Either make a template or measure the distance you want the handles to sit on the side of the tray, and centre the handles. Make sure the handle measurements and dimensions on the two side wood pieces (19mm x305mm x 250mm) are the same.Use the hole saw to drill and cut two holes on either end of the marked-out handle, use a pencil and speed square to draw two straight lines that connect the edges of the two circles made by the hole saw bit.Then take a jigsaw and cut out the two lines that connect these two holes, once cut out you can see the shape of the two cut out handles, be sure to sand any rough edges.
-
Step 6 Glue and secure the sides
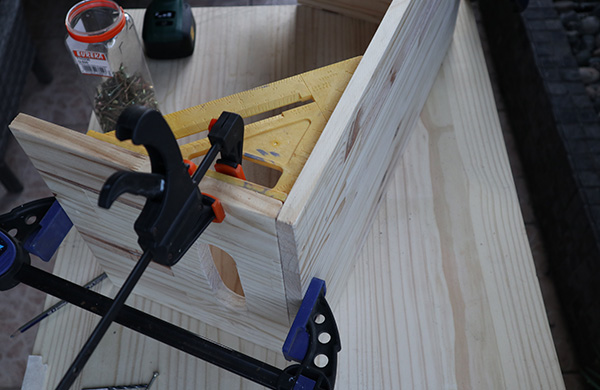
Use a wood glue and spreader clamps to secure the sides of the tray and drive in the wood screws into the pilot holes with the matching driver bit inserted in your power drill.To make sure your drilling and side wood pieces (19mm x 305mm x 205mm) are sitting 90 degrees to the main wood board (19mm x305mm x 600mm) make use of the speed square and clamp into place before driving in the wood screws.
-
Step 7 Fill screw holes
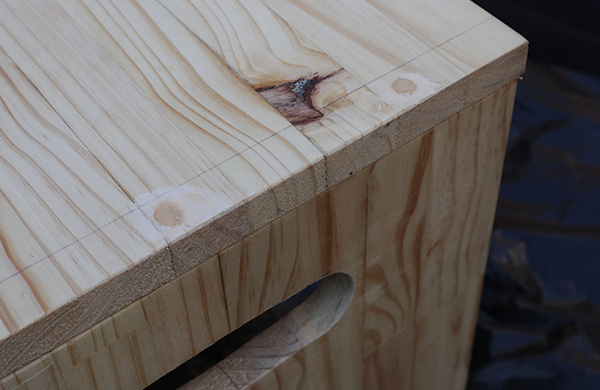
Using a scraper and pine colour wood filler, fill the screw holes allow to fully dry and then sand surface smooth.
-
Step 8 Paint and seal

Apply with a clear sealer, wax, paint or spray application and follow the instructions on the product packaging. A clear wax was used for this project. Once dry, the DIY Laptop tray or stand is ready for use.


